In this post, I am
going to share on how to switch of certain layers or elements in linked Revit
models.
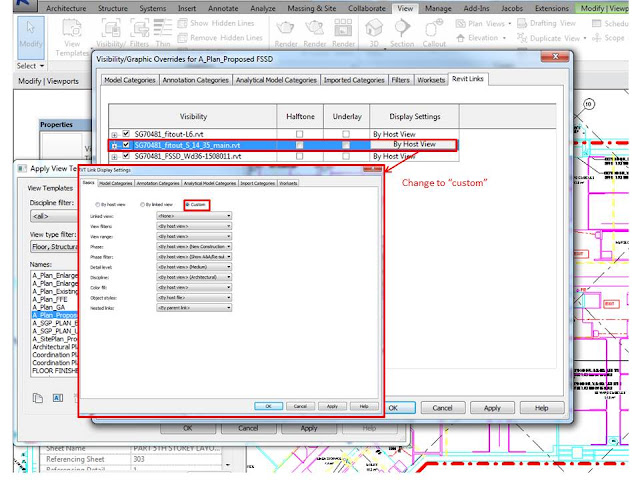
1. Go to view ribbon > user interface > check properties. You will then see a properties pop up window. Under the properties window, go to identity data, under view template, click the view template itself.
2. Under view template, go to V/G Overrides RVT Link. Click Edit.
3. Under the linked Revit file, change display settings from "by host view" to "custom" as below :
4. Go to the second tab (Model categories), change "<by host view> " to "<custom>".
When it is "by host view" the details in the table are greyed out. No changes can be made.
5. Once it is changed to "custom", the details in the table can be changed. Here is where we can start to switch on and off certain layers or elements in linked revit model.
6. In our case, we would like to switch off egress and ingress path in the drawing since this is a sanitary submission. So under generic models, switch off "egress path, egress solid and hidden lines".
7. Now, the escape route in the linked model is switched off and the drawings only reflect details required for sanitary submission.


No comments:
Post a Comment